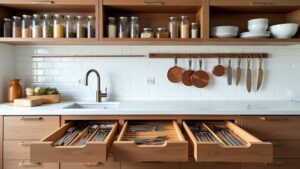
Your countertop probably has more on it than you actually use.
That’s worth sitting with for a second.
Most people style their kitchen around habit, not intention — and there’s a real difference. What stays on your counter shapes how the whole kitchen feels, how quickly it gets messy, how easy it is to cook.
So before anything else, you need to ask yourself what’s actually earning that space.
The Essentials
- Clear all countertops first, then return only items used daily to ensure every piece earns its place.
- Limit appliances to those used several times weekly; infrequent-use items belong in cabinets, not on counters.
- Group functional items in odd numbers, varying heights to create intentional, visually balanced arrangements without clutter.
- Add one natural element, like a potted herb, to warm the space without compromising a minimalist approach.
- Build daily habits of clearing non-essentials, wiping surfaces, and scanning for misplaced items to maintain styled countertops.
How Your Kitchen Size Should Shape Your Countertop Styling
The size of your kitchen plays a bigger role in countertop styling than most people realize. A compact kitchen needs small space solutions that keep surfaces mostly clear — too many objects and it feels cramped fast. Think about what you actually use daily versus what just sits there.
Layout considerations matter too. An L-shaped kitchen has natural zones, so you can group items intentionally without cluttering the whole space. A galley kitchen? You’ve got even less room to work with.
Bigger kitchens come with their own challenge — too much empty counter can feel cold and unfinished.
Clear Everything Off Before You Make Any Decisions
Before you start making any decisions about what stays and what goes, clear everything off your countertops completely. Every single thing—the coffee maker, the fruit bowl, the random stack of mail you’ve been ignoring. Once it’s all gone, you’ll get a much clearer read on the actual space you’re working with and what you actually need on it.
Start With a Blank Slate
When it comes to styling your kitchen countertops, the smartest thing you can do first is clear everything off — yes, everything. The blender, the mail pile, the random charger that somehow lives there. All of it.
Starting with a blank slate forces you to think intentionally. What actually needs to be on the counter? What’s just sitting there out of habit?
A minimalist approach doesn’t mean cold or empty. It just means you’re choosing what stays rather than letting clutter decide for you.
Pull out only your essential tools — the things you genuinely use daily. Then pause. Look at the space.
You might realize you need less than you thought. Or maybe you’ll find the counter’s been working against you this whole time.
Assess What Remains
Now that everything’s off the counter, take a real look at what you pulled out. Not everything deserves to go back. Some of it probably shouldn’t have been there in the first place.
This is where a minimalist approach actually helps you make better decisions. Ask yourself: does this item earn its spot? Does it get used daily, or does it just sit there?
Functional beauty matters here. You want things that work *and* look intentional — not just things that landed on the counter because you had nowhere else to put them.
Group items by how often you use them. Daily stuff gets consideration. Weekly or less? Probably belongs in a cabinet.
Don’t rush this part. It shapes everything that comes next.
The Daily-Use Items That Deserve Permanent Counter Space
There are a handful of items that genuinely earn their place on your counter every single day, and those are the ones worth keeping out permanently. Think about what you actually reach for before your first coffee. That’s your starting point.
Your must have essentials usually come down to four things:
- Coffee maker or electric kettle
- Knife block or magnetic strip
- Toaster or toaster oven
- A small dish or tray for keys, oils, or daily grab-and-go items
Now, aesthetic balance matters here too — but don’t let that pressure you into keeping something out just because it looks nice. Function comes first, always. If you’re not using it daily, it’s probably just taking up space you actually need.
The Appliances Worth Keeping on Your Kitchen Counter
Beyond the daily-use basics, there’s a bigger question worth asking: which appliances actually pull their weight on your counter long-term?
Think about appliance function first. Does it get used at least a few times a week? If not, it probably belongs in a cabinet.
Your coffee maker, toaster, or air fryer might genuinely earn that space. But every appliance you keep affects the aesthetic balance of your counter — more stuff means more visual noise.
Ask yourself honestly: does this appliance serve you daily, or does it just feel too heavy to move?
Keep what you actually reach for. Let go of the rest. Your counter space is limited, and the appliances sitting on it should reflect how you actually cook — not how you planned to.
The Trays and Risers That Make Countertop Styling Look Deliberate

Trays and risers are one of those small additions that quietly change how your whole counter reads. They create decorative balance without requiring much effort. The right tray styles — marble, wood, woven — pull scattered objects into one intentional zone. Riser heights add layering techniques that give your counter actual dimension.
Here’s what to evaluate:
- Group by function — Keep like items together on one tray
- Vary riser heights — Different levels create visual appeal without clutter
- Mix materials carefully — Contrast adds functional aesthetics without chaos
- Leave breathing room — Not every inch needs filling
You don’t need matching sets. Sometimes one good tray does more than three coordinated ones. Trust that restraint is part of the styling, not a sign you haven’t finished.
How to Group Items So Your Counter Looks Intentional
Once you start grouping items on your counter, it helps to think about function first—keep your coffee stuff together, your oils near the stove, that kind of thing. From there, odd numbers actually work better than even ones, so three items in a cluster tends to feel more natural than two or four, even if you’re not sure why. You’ll also want one thing in each grouping to feel like the anchor, something slightly taller or more visually interesting that the other pieces kind of organize themselves around.
Grouping by Function First
The simplest way to make your counter look intentional is to group items by what they actually do together. Think functionality focus before anything else — aesthetics come second, honestly.
Ask yourself: what do you actually reach for at the same time?
- Coffee station — machine, mugs, sugar, spoons
- Prep zone — cutting board, knife block, oil, salt
- Breakfast corner — toaster, bread, a small plate or two
- Morning grab — vitamins, a glass, maybe your water bottle
Once you’ve got function sorted, aesthetic balance starts happening almost naturally. You’re not decorating — you’re organizing with a little intention.
Don’t overthink the arrangement. If the grouping makes your morning faster, it’s probably working. That’s kind of the whole point.
Using Odd Numbers Strategically
Once you’ve got your functional groups figured out, there’s a simple visual trick that makes a real difference — odd numbers.
Three items almost always look better than two or four. It’s one of those design principles that just works. A single candle, a small plant, and a wooden bowl — that’s counter harmony without overthinking it.
Even with a minimalist approach, you can create eye catching displays using just three decorative objects. The arrangement tips here are pretty straightforward: vary the heights, keep the spacing loose, and don’t match everything too perfectly.
Odd groupings create visual balance because your eye keeps moving. Even numbers feel static. Ask yourself — does your arrangement tips feel finished or alive?
Functional beauty lives somewhere between styled and actually useful. That’s the goal.
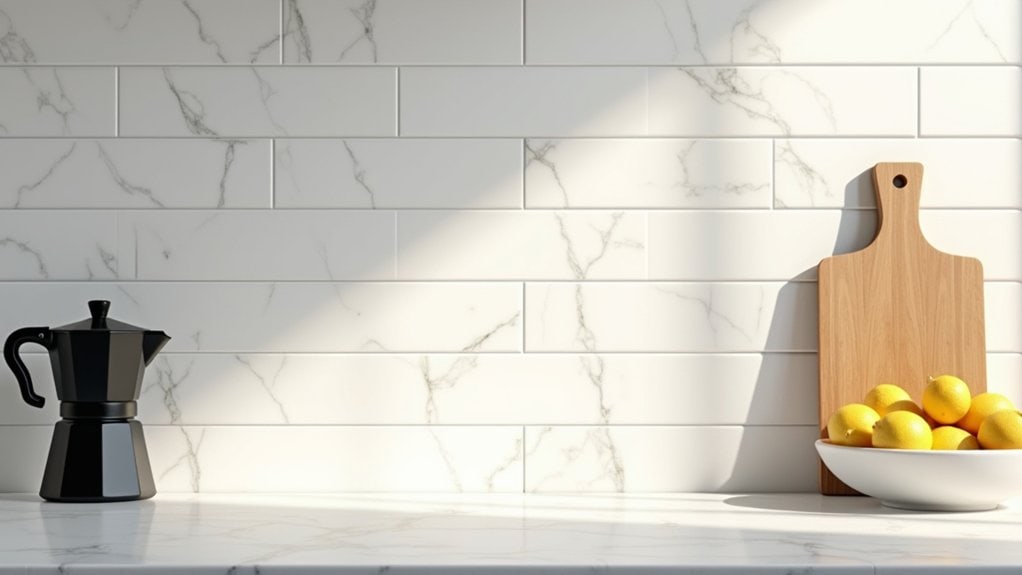
Anchoring With a Focal Point
Every well-styled counter needs something that grounds it — a focal point that tells your eye where to start. It could be a cookbook, a plant, even a wooden cutting board leaned against the backsplash.
Once you’ve got that anchor, build around it with intention. Think about visual balance — not perfect symmetry, just enough weight on each side so nothing feels abandoned.
Here’s a simple way to approach it:
- Pick one taller item as your focal point
- Add a mid-height piece beside it
- Place something small and low in front
- Leave actual empty space — don’t fill every gap
You don’t need a lot. You just need the right starting point, and the rest tends to follow naturally from there.
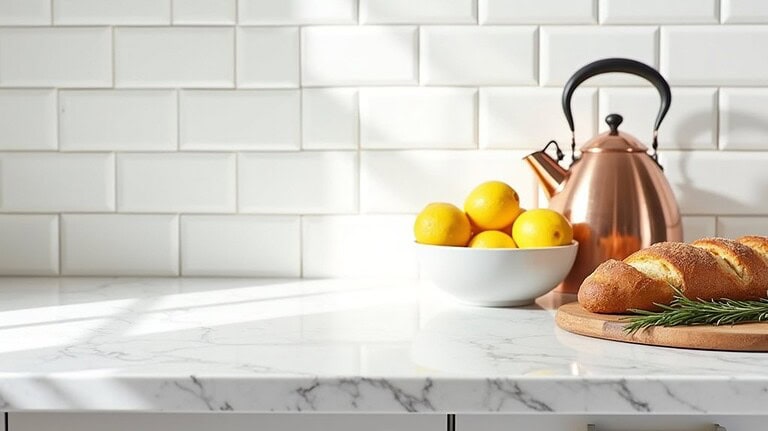
Adding a Natural Element Without Overdoing It
Whether it’s a small potted herb or a single stem in a vase, adding something living to your countertop can make the whole space feel a little warmer. You don’t need much. Actually, one piece is usually enough.
Think about natural textures — a terracotta pot, a rough linen napkin underneath a plant. Those small details add something real without trying too hard.
Organic shapes work well here too. A curved branch, an irregular-shaped bowl of fruit. Nothing perfectly symmetrical.
The tricky part is knowing when to stop. You add one plant, then another, and suddenly it feels cluttered. So maybe ask yourself — does this actually add something, or am I just filling space?
One living element. That’s honestly plenty.
The Color and Material Combinations That Undermine the Look

Some combinations just don’t work, and it’s not always obvious why until you’re staring at your countertop wondering why it feels off.
Color psychology plays a real role here. Certain pairings create visual tension you didn’t plan for.
Watch out for these:
- Warm wood tones next to cool gray stone — they fight each other
- Matte black accessories on busy, veined marble — too much competing for attention
- Copper or brass near blueish quartz — the undertones clash harder than you’d expect
- Mixing materials with similar but not matching durability levels — it shows unevenly over time
Material durability also affects how combinations age. Something that looks cohesive now might feel mismatched after a year of use. Are you styling for today or for longer?
The One Question to Ask Before Anything Touches Your Counter
All of that — the color clashes, the material mismatches, the combinations that age badly — it comes down to one thing you probably skipped.
Before anything touches your counter, ask yourself: does this actually need to live here?
That’s it. That’s the whole styling strategy.
Counter clutter doesn’t usually happen all at once. It builds. One thing at a time, each feeling reasonable on its own. But you never stopped to ask whether the counter was even the right place for it.
Some things earn that space — things you use daily, things that genuinely look right where they are.
Most things don’t.
Simple Daily Habits That Keep Your Countertops Looking Styled
Keeping your countertops looking good really comes down to a few small things you do every day—or honestly, don’t do. Get in the habit of clearing off anything that doesn’t belong there at the end of each day, and when you do keep items out, group them together instead of just scattering them around. A quick wipe-down after cooking takes maybe thirty seconds, but it’s the kind of thing that makes your whole kitchen feel more put-together without you really having to think about it.
Clear Counters Daily
Clearing your counters every day sounds simple, but it’s honestly one of those habits that’s harder to stick to than it seems. A minimalist approach really does help here — the less you own on the counter, the less you have to deal with daily. Think about countertop organization as a routine, not a project.
Try building these four steps into your day:
- Put away anything you used while cooking
- Wipe down the surface after meals
- Return misplaced items to their actual home
- Do a quick scan before bed
Does every item on your counter genuinely earn its spot? That question alone changes things. You don’t need perfection — just consistency, and maybe a lower tolerance for random stuff piling up.
Group Items Intentionally
Most things on your counter probably don’t need to be there — but the ones that do should actually make sense together.
Think about item balance. Your coffee maker, a small tray, maybe a plant — do they feel like they belong near each other, or did they just land there randomly?
Grouping things with visual harmony in mind doesn’t mean everything has to match. It means placing items that share a purpose or a general vibe close together. Coffee stuff near the coffee maker. Oils and salt near the stove.
Ask yourself: would someone walking in think this looks intentional?
You don’t need to overthink it. Even loosely grouping two or three things can shift how the whole counter feels.
Wipe Down After Use
Styled countertops don’t stay that way on their own — a quick wipe after cooking or making coffee does more than you’d think. It’s not really about cleaning. It’s about maintaining the look you worked to create.
A simple countertop maintenance habit keeps everything feeling intentional rather than neglected.
Build your cleaning routine around these four moments:
- After cooking a meal
- After your morning coffee setup
- Before bed — just a fast pass
- After grocery unloading
You don’t need special products. A damp cloth works.
The thing is, clutter and mess accumulate fast on countertops. Even one day of skipping it shows. Does your current routine actually support the styled look you’re going for? Small, consistent habits protect that effort better than any décor choice will.
Frequently Asked Questions
Can Countertop Styling Work in Rental Kitchens With Limited Customization Options?
Yes, you can absolutely style your rental countertops despite restrictions! Work within rental restrictions by focusing on functional aesthetics—use removable trays, portable appliances, and decorative essentials that you’ll take with you when you move.
Does Countertop Styling Differ for Kitchens With Dark Versus Light Cabinetry?
Yes, it does! With dark cabinetry, you’ll want lighter accessories to create contrast. With light cabinetry, you can incorporate bolder, deeper tones. Either way, you’re balancing visual weight to keep your countertop feeling intentional and uncluttered.
How Do I Style Countertops When I Have Young Children at Home?
Keep your countertops minimal and intentional. Embrace childproof decor by storing sharp tools away and choosing durable, washable accessories. Prioritize functional aesthetics — display only what you need, keeping surfaces clear so you’re always one step ahead of curious little hands.
Should Countertop Styling Change Seasonally or Stay Consistent Year-Round?
You can blend both approaches! Keep your essentials consistent year-round, but follow seasonal trends with small, swappable accents. Here are practical tips: swap a vase or small decor piece to refresh your countertop without creating clutter or chaos.
Can Open Shelving Replace Countertop Styling in Minimalist Kitchen Designs?
Yes, open shelving can replace countertop styling in your minimalist kitchen! You’ll embrace open shelving benefits by displaying essentials vertically, keeping surfaces clear. This approach strengthens minimalist aesthetics, letting your countertops breathe while you maintain a clean, intentional design.
Final Thoughts
Your countertop doesn’t need to be perfect — it just needs to work for you.
Start small. Pull one thing off that you haven’t touched in weeks. See how that feels.
The goal isn’t a styled kitchen from a magazine. It’s a surface that makes your mornings easier and doesn’t stress you out when you walk in.
That’s honestly enough to aim for.